A Simple Kitchen Oil Trick to Soften the Look of Wrinkles
As the years go by, fine lines and deeper wrinkles can become more visible, often making people feel less confident every time they see their reflection. It can be discouraging when your face seems to age faster than how you feel inside, affecting both mood and daily interactions.
While high-end creams can be costly and sometimes deliver only modest improvements in skin texture, there is a simple alternative many people are exploring: a “kitchen oil trick” that uses two affordable oils—coconut oil and castor oil—for a more natural, moisture-focused routine.
The real advantage of this method lies in how these two common oils work together to support skin hydration exactly where it’s needed most.

Why the Kitchen Oil Trick Is So Popular for Wrinkles
Watching wrinkles gradually deepen can feel emotionally draining, turning situations like taking photos or meeting friends into a source of stress. This kitchen oil trick is appealing because:
- It uses only two oils that are easy to find in most kitchens or local stores.
- The total cost is usually under $15.
- It focuses on hydration and barrier support rather than harsh active ingredients.
Research suggests that virgin coconut oil is rich in lauric acid and offers strong moisturizing benefits, which may help maintain the skin’s barrier. Castor oil, high in ricinoleic acid, is known for its ability to lock in moisture and provide a soothing feel.
When blended correctly, this simple oil combination targets the dryness that can make wrinkles appear more pronounced.
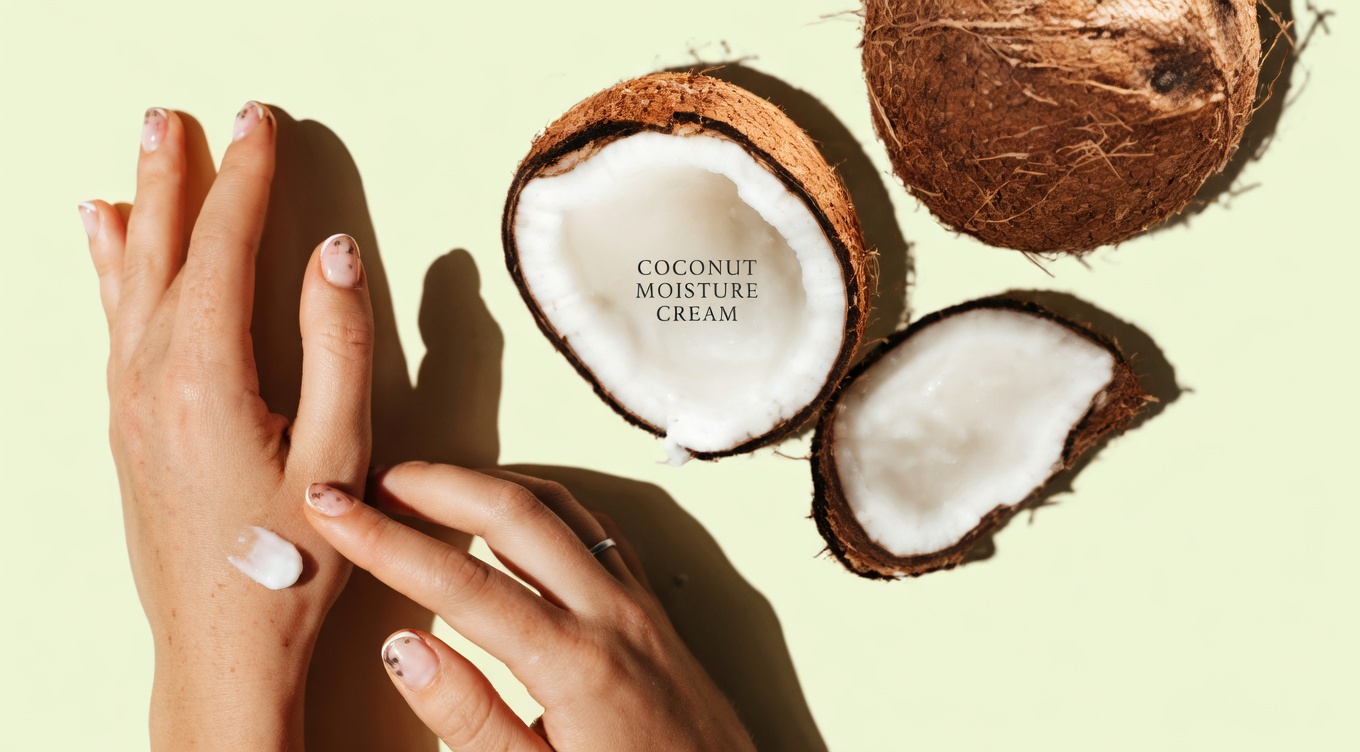
How Coconut Oil Supports Mature, Dry, or Tired-Looking Skin
The appearance of wrinkles often goes hand in hand with concerns about looking tired, dull, or older than you feel. In the kitchen oil trick, coconut oil plays the starring role.
Virgin, cold-pressed coconut oil has been studied for its hydrating effects, with some findings showing improved skin moisture levels and support for a healthier skin surface. Its lauric acid content may help create a more balanced environment on the skin.
Many people dealing with dryness-related wrinkles appreciate that coconut oil:
- Feels relatively lightweight when used in small amounts
- Helps soften rough or tight areas
- Can give mature skin a more comfortable, nourished feel
Within this routine, coconut oil forms the base that makes the blend glide easily over the skin without feeling overly heavy when used correctly.
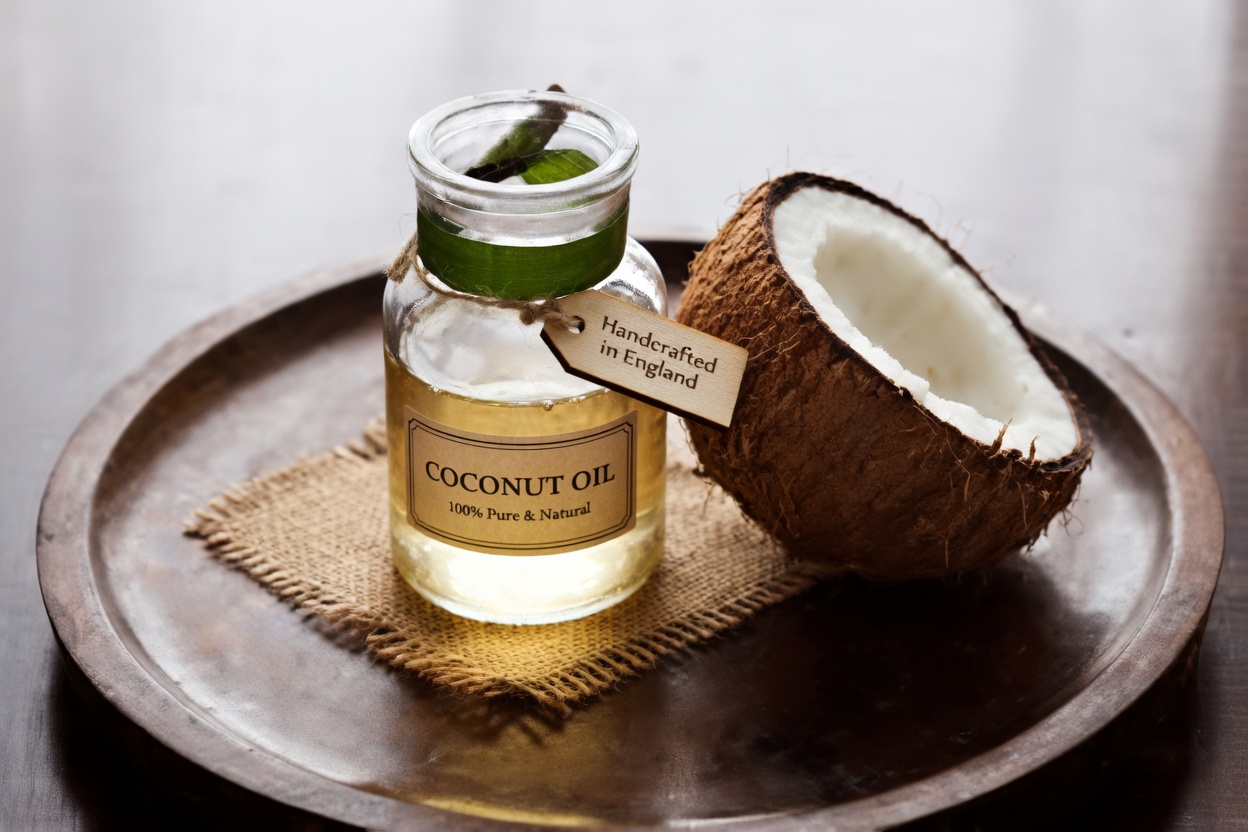
Castor Oil: The Deep-Hydrating Partner in the Kitchen Oil Trick
Lines around the eyes, mouth, and forehead can make you feel less vibrant and outgoing. Castor oil adds a deeper, more intensive hydration element to the blend.
Castor oil is thicker than coconut oil and is valued in skincare for:
- Its ability to penetrate the upper layers of the skin
- Providing long-lasting moisture
- Ricinoleic acid, which offers anti-inflammatory properties and can feel calming on irritated or stressed skin
In the kitchen oil trick, castor oil helps create a protective, moisture-sealing layer. Many users report that, with time, their skin feels smoother and more cushioned, especially in areas where wrinkles tend to be most visible.
The Ideal Coconut–Castor Oil Ratio for This Trick
One important detail about the kitchen oil trick is that the way you combine the oils affects both texture and absorption.
A commonly used starting ratio is:
- 60% virgin coconut oil
- 40% castor oil
This balance helps to:
- Lighten the thick, sticky feel of castor oil
- Improve spreadability so the blend glides over the skin
- Reduce greasiness while still delivering rich hydration
The resulting blend tends to absorb relatively quickly, which is helpful on busy mornings when you want to care for your skin without leaving an oily film.
A 2-Minute Step-by-Step Routine for the Kitchen Oil Trick
Incorporating this oil blend into your daily ritual can help you feel more positive about your skin, even if wrinkles have been a long-standing concern. For best results, apply it right after cleansing, while the skin is still slightly damp.
How to use the kitchen oil trick:
-
Prepare your blend
- Mix your 60/40 coconut oil and castor oil ratio in a small dark glass bottle.
- Add a few drops of vitamin E oil to help keep the blend fresher for longer.
-
Dispense a small amount
- Use about 3 drops for the face, or 4 drops if you are including the neck.
-
Warm the oil
- Rub the oil gently between your palms for a few seconds to warm and thin the blend.
-
Apply with gentle pressure
- Press (do not rub harshly) the oil into the neck, jawline, cheeks, and forehead.
-
Treat delicate areas carefully
- With your ring finger, lightly tap around the eye area and the lines around the mouth.
-
Finish with light tapping
- Use gentle tapping motions over the entire face for about 20 seconds to encourage absorption.
The full process takes about two minutes and can become a relaxing, comforting part of your daily self-care.

What People Commonly Notice With Consistent Use
Seeing new lines appear month after month can trigger anxiety about aging and how others perceive you. While everyone’s skin responds differently, many people who stick with this kitchen oil trick report:
- Skin feels softer and more supple after a few weeks
- Dry, tight areas feel more comfortable
- Makeup goes on more smoothly and looks less patchy
- The complexion appears more radiant and less dull
These improvements can help restore some of the confidence that wrinkles may have taken away, especially when the routine is done consistently over time.
How to Choose Quality Oils for Better Results
Using low-grade or heavily refined oils can reduce the potential benefits, especially when you’re hoping to see a visible improvement in how your skin looks and feels.
For this kitchen oil trick:
-
Coconut oil
- Choose virgin, unrefined, cold-pressed coconut oil.
- It should solidify at cooler room temperatures.
- A mild, natural coconut scent is a good sign of minimal processing.
-
Castor oil
- Look for cold-pressed, hexane-free castor oil.
- A light yellow color is typical of higher-quality options.
Selecting better ingredients sets you up for a more pleasant experience and potentially more noticeable results over time.
Optional Additions to Enhance Your Kitchen Oil Blend
Once you’ve used the basic coconut–castor blend for a couple of weeks and feel comfortable with it, you can experiment with small additions that target specific concerns.
Popular add-ons include:
- Rosehip oil – Often used to support more even tone and the appearance of sunspots or discoloration.
- Sea buckthorn oil – Known for its calming feel and rich antioxidant content, which some people like for stressed or weather-exposed skin.
- Vitamin E oil – Helps preserve the blend and adds extra antioxidant support.
These optional boosters can make your kitchen oil routine more personalized, especially if wrinkles, dullness, or uneven tone remain top concerns.
Common Mistakes to Avoid With the Kitchen Oil Trick
A few simple missteps can reduce the effectiveness of this routine. To get the most from your kitchen oil trick, try to avoid:
-
Using too much oil
- More than 3–4 drops can feel heavy and may sit on top of the skin.
-
Applying on completely dry skin
- Using the oils on slightly damp skin helps lock in moisture more effectively.
-
Rubbing aggressively
- Vigorous rubbing can tug at the skin; gentle pressing and tapping are kinder, especially on areas prone to wrinkles.
-
Choosing refined, low-quality oils
- Over-processed oils often lack the beneficial components found in minimally processed versions.
-
Giving up too quickly
- It often takes several weeks of consistent use to notice textural and comfort changes.
By steering clear of these common mistakes, you give your skin a better chance to benefit from this simple natural approach.

Wrapping Up Your Kitchen Oil Trick Routine
This straightforward kitchen oil trick with coconut oil and castor oil offers an affordable, minimalist way to nurture your skin daily. By weaving it into your morning (and optionally evening) routine, you may gradually feel more at ease with the wrinkles that once caused frustration.
Patience and consistency are crucial—focus on supporting your skin’s moisture and comfort rather than expecting instant, dramatic changes.
Frequently Asked Questions About the Kitchen Oil Trick
How long should I use the kitchen oil trick before expecting visible changes?
Many people commit to using the kitchen oil blend regularly for at least 4–6 weeks before evaluating results. This gives your skin time to adjust to the added moisture and barrier support. Some notice softness sooner, but more visible differences tend to appear with ongoing use.
Is the kitchen oil trick suitable for sensitive skin?
It can be, but it’s essential to patch test first. Apply a very small amount of the blend to a discreet area (like behind the ear or along the jawline) and wait 24 hours:
- If no redness, itching, or irritation appears, you may gradually introduce it to a larger area.
- If irritation occurs, discontinue use and avoid further application.
Can I use the kitchen oil trick at night as well?
Yes. Many people apply the blend both morning and evening, especially if they struggle with dryness that emphasizes fine lines and wrinkles. Using it at night can give the oils more time to work while you sleep, potentially enhancing the feeling of softness and comfort by morning.